Thursday, April 26, 2012

Cinnamon Chip Scones

Found this one when I was writing the other post today.  Thought I would get it posted since it was already written.

I have been on a quest to make a Cinnamon Chip Scone for my tea party class.  I know cream scones are traditional, but I really like cinnamon.

For this recipe you will need:

1/4 cup Sugar
1/2 cup Cinnamon Bits (I will talk more about these below)
2 & 1/2 cups All Purpose Flour
1 Tbsp. Light Brown Sugar, packed
1/2 tsp. Cinnamon, ground
1 & 1/2 tsp. Baking Powder
1/2 tsp. Salt
1/2 cup Butter, unsalted
1 Egg
1/2 tsp. Pure Vanilla Extract


For the topping:
6 Tbsp. Sugar
2 tsp. Cinnamon, ground
3 Tbsp. Sparkling Sugar (I'll talk more about this below as well)

Preheat your oven to 400 F.


First thing first you need to soak the cinnamon bits in the 1/2 & 1/2 for 20 minutes. I wouldn't do this for longer because they will weep and then you don't get the concentration of flavor that you want.  If you don't soak them first; you have hard bits in your scones that are unappealing.  I purchased the ones I used from the King Arthur website here.  The picture above are my bits soaking in the half and half.


 While your bits are soaking, go ahead & measure out your dry ingredients into a bowl.  Make sure that you also take your butter out of the fridge.  You want it to soften a little, but not get TOO soft.


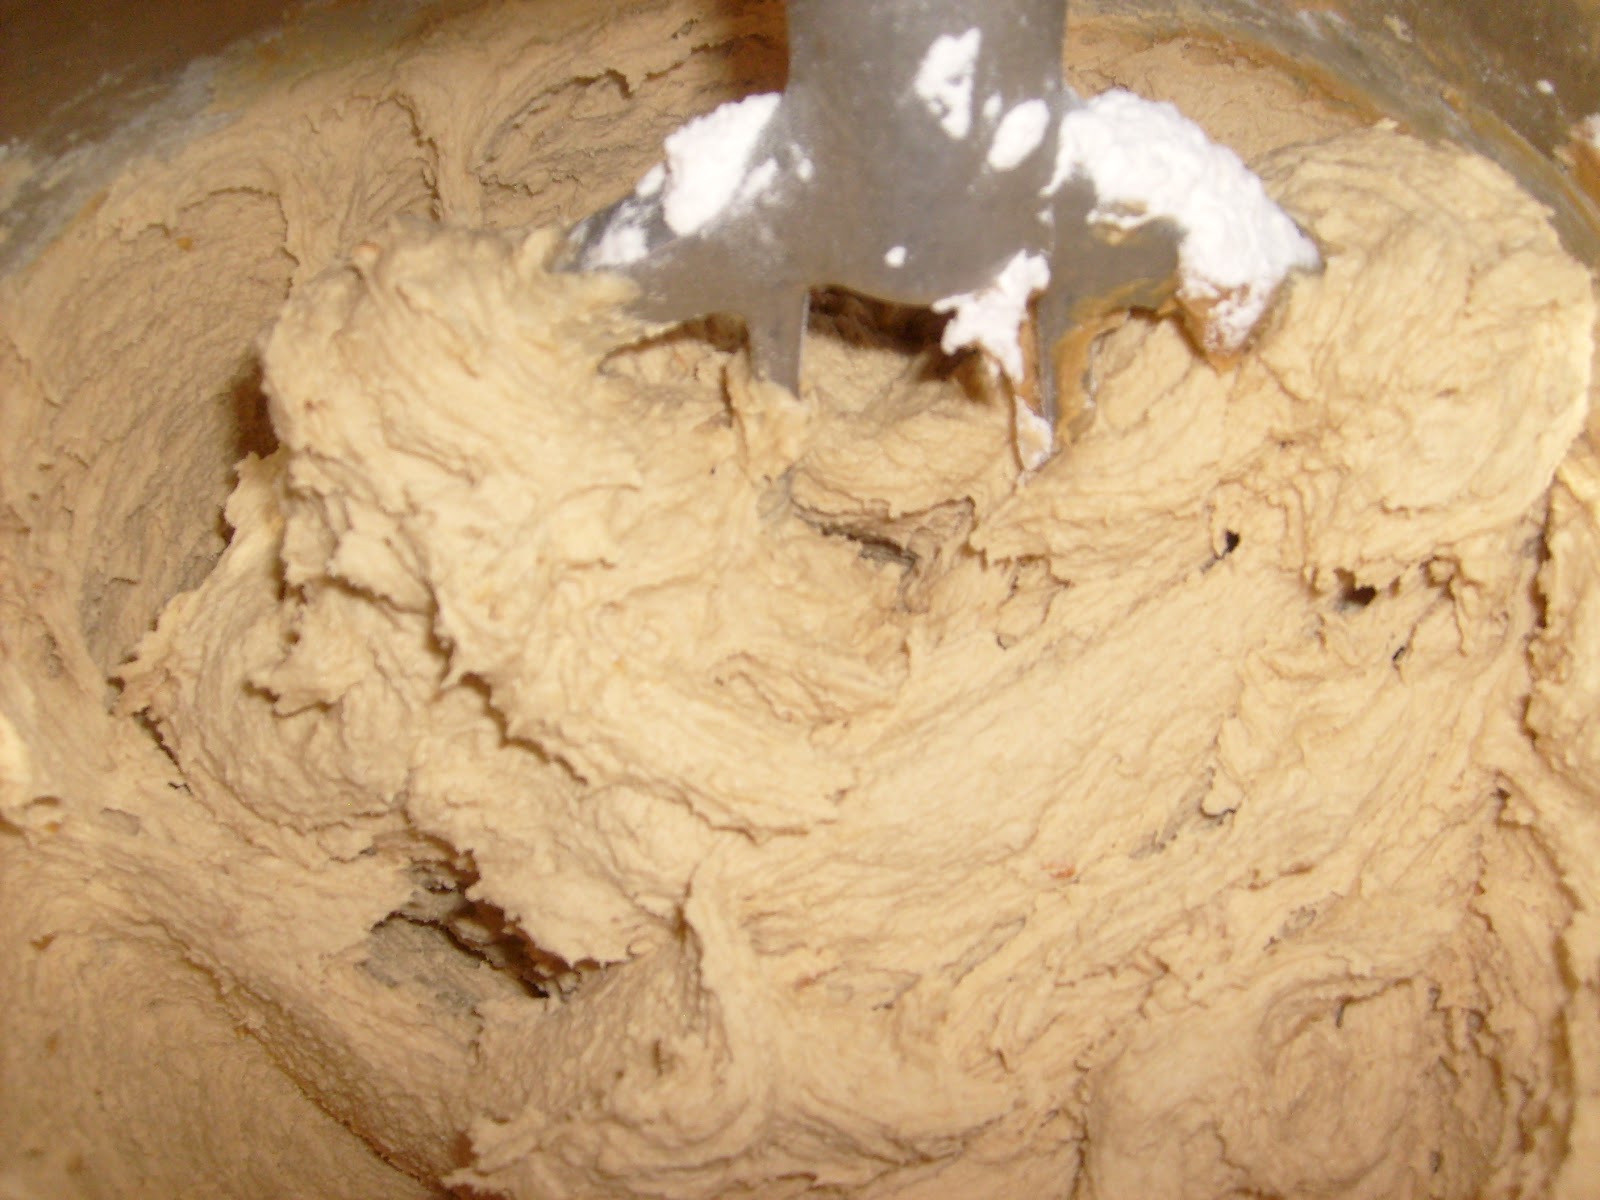
Start to cut the butter into the dry ingredients.  I do this by hand.  I find that I get less large lumps this way & it also prevents over mixing/blending.


The above picture shows what it looks like after I've worked the butter in to the proper consistency.  The picture below shows where I've taken & pressed part of the mixture together & it's held, but it's also easy to break back up again.  It's hard to describe this, you just need to try it & get a feel for it.  The flour mixture will not press together if the butter isn't dispersed through it properly.  Hope this helps to explain it.


Add your egg & vanilla to the half & half/cinnamon bit bowl & then mix into the dry ingredients.  Do not over mix.  Just get it all to come together.


Turn it out onto a lightly floured board & then roll out or shape by hand evenly.  I worked my into a rectangle because I knew I was going to cut mine with a knife.


Sprinkle evenly with 2 Tbsp. of the topping.  I used a Sparkling Sugar to add a little bit of definition to the surface of the scone.   I just think it's going to look better for the class & eye appeal is important when it comes to plate presentation.


Here are my cut scones before they go into the oven.  You can use a round cutter if you prefer that shape, I was going for 2" squares (I'm going to have to shape my corners better in the class) & that worked out pretty well for me.


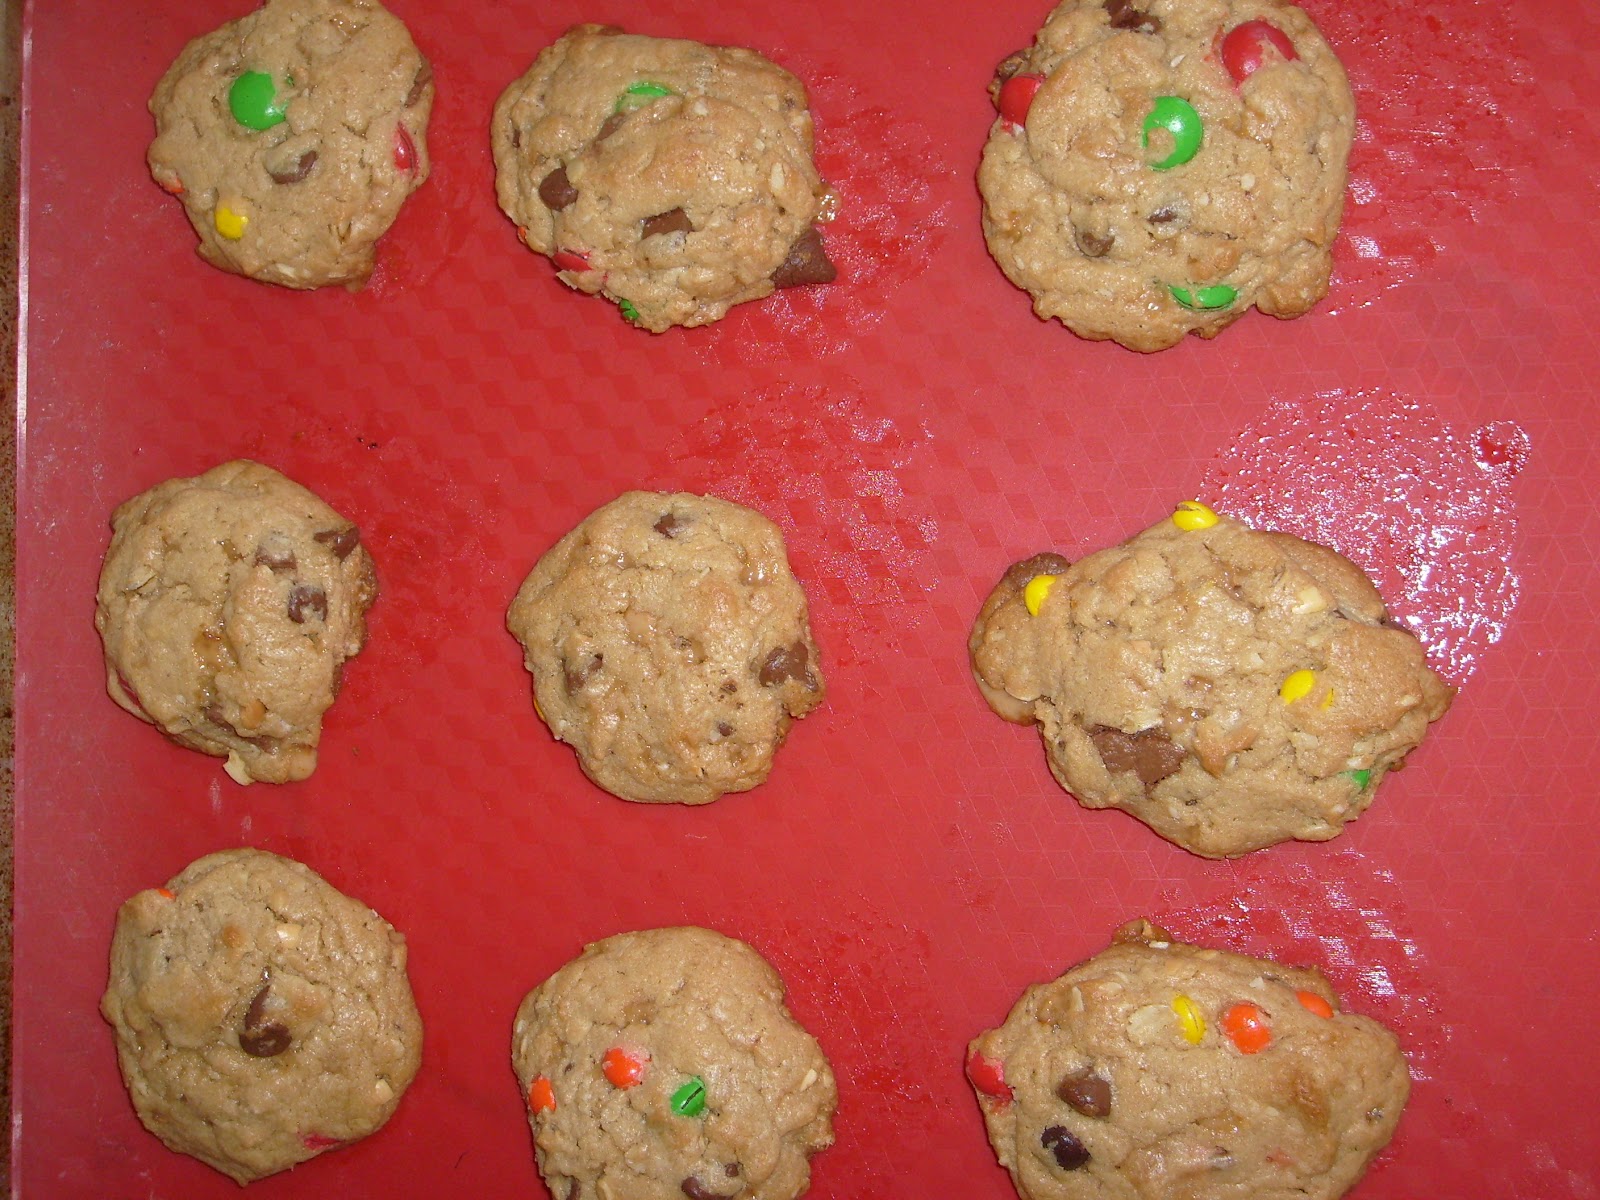
Bake for 20 minutes.  Allow to cool & enjoy!  I had 20 scones come out of the oven, 1 just didn't make it on the tray long enough for the picture.

Keep in mind if you cut your scones larger that you will probably need to increase your baking time.
Also, I read somewhere while I was working on these, if you freeze your scones for 20 minutes after cutting them it is supposed to increase their rise.  I didn't try this, but at some point might try it since I like to freeze doughs & bake then when I'm ready .  It would make for a nice weekend morning breakfast treat to just pull a few scones out of the oven & bake them.  Let me know if any of you try it before I get a chance.

Monday, March 19, 2012

Ramen Slaw

This one's for Arlene, who asked me to post this recipe 2 weeks ago or so.  Sorry it took so long!

For this recipe you will need:

5 packages of Ramen Noodles *make sure to have 2 that are ORIENTAL flavor.  I'm going to use 4 the next time I make this...I thought it was a little noodle heavy this time.
2 Carrots, grated.  3 would also be good
1 bag Broccoli Slaw. I'm probably also going to use 2 of these next time. I purchased the Organic version, which was very nice but might have a slightly lower package weight. 
1 bunch scallions aka green onions
6 Tbsp. Rice Wine Vinegar, seasoned
5 Tbsp. Vegetable Oil
2 tsp. Toasted Sesame Oil
1/2 Cup Sesame Seeds
Salt & Pepper to taste
Optional:  Cashews, Broccoli florets


Break "bricks" of Ramen noodles before opening the packages into 4 or 6 pieces (this saves having to cut the noodles later).  Open packages and set aside seasoning packet. Boil Ramen Noodles according to package directions, drain and set aside.  


I grated my carrot directly into my large bowl to save washing extra dishes later.  Slice the green onions & add them into the bowl as well.  I added my bag of broccoli slaw and then tossed in the ramen noodles after they cooled off a little.


While the ramen was cooking I mixed the dressing.  I used 2 of the Oriental Flavor packets that came in with the ramen noodles.  Add the vinegar & oil and whisk to combine.  Taste it & see if you think this needs a little sweetness.  I *think* I added a little light brown sugar to the dressing, but can't remember. 


Toss the dressing onto the mixture, add the sunflower seeds & you are ready to go!  Season with salt & pepper to taste.  After I made the initial batch of this I found some cashews & those fit in really well with this.  I also think some blanched broccoli would also add some more color & a nice crunch to this salad.  As you can tell, I want it to have more vegetables and less noodles next time.

Hope you all enjoy it.  We had this with the baked beans I posted a couple weeks ago & some pulled pork sandwiches. 


Thursday, March 8, 2012

Come & See Me Cook in May

For any of you that might be in Olympia, Wa. this coming May, I will be teaching an English Tea Class at the Bayview School of Cooking May 9.  I'm currently working on several recipes for the class & it would be wonderful to see some friendly faces there.  Call the school directly at 360-754-1448.  It costs $45 to attend the class, but if you bring a friend it's $80 for both of you. It sounds like it's starting to fill up, so if you want to come, sign up sooner rather than later.

Sunday, March 4, 2012

Baked Beans from Dried Beans

I made baked beans from scratch for the first time this week & they turned out great!

For this recipe you will need:

1 LB dried navy beans
1/2 of a med size onion (I will probably use a whole onion in my next batch)
Approx. 1/2 LB of Black Pepper Bacon Ends, you can also use a nice lean bacon with the excess fat trimmed off of it.  See your local butcher to find out if they sell the ends. They usually are priced less per pound.
3/4 C. Packed Light Brown Sugar (or Dark Brown, see below)
1 C. Ketchup
1 C. BBQ Sauce (I used a darker, Kansas City style)
2 Tbsp. Whole Seed Mustard, basically I used a nicer mustard, not the yellow kind
2 Tbsp. Apple Cider Vinegar, I like a little extra tang, if you don't then you won't need this.
1/2 C. Cooking Liquid from the beans


I cooked a 1 LB bag of navy beans in salted water over low heat for a couple of hours and then allowed it to cool slightly and refrigerated them overnight in the pan.  I used enough water to cover the beans & kept adding water if the level got too low.  When I started the beans on the heat, I did bring the pan to a boil first, and then reduced the heat to low.  The picture above is what they looked like in the morning when I put them back on the stove to warm up while I got the other parts of the beans ready to bake.


I really didn't want raw or super crunchy onion with my beans, so I put them in a saute pan with a little olive oil on the stove first over a medium to medium high temperature.


Here are my Black Pepper Bacon Ends that I've diced up & removed the fattiest parts from.  It looks almost like ham, doesn't it?  It was GOOD!  Like I said above, check with your local butcher to see if they sell these in your area.  Ours sells them for a price that is more than half off per pound than the regular bacon & I found this batch to be very meaty, which was really nice.


Drain your beans (reserving some of the liquid to cook with), and then place them in an oven safe container.  Preheat your oven to 375 F.


Here are my onions after about 10 minutes or so.  I didn't intentionally try to brown them, I just got busy with the bacon ends.  So, at this point I'm adding in the bacon ends.


 I wanted to go ahead & get out some of the excess liquid from the meat & brown it up a little.


Another perk of cooking the onions/meat on the stove ahead of time was that I could go ahead & melt my sugar before putting it in the oven.  This just gives it a smoother texture.  Once the sugar melted, everything went in with the beans.


I added all of the other ingredients listed above, along with some salt & pepper, gave it a stir & then let it bake for 2 & 1/2 hours or so.  I did stir it a couple of times at the beginning.  The above picture is what it looked like after about a half hour of cooking, and the bottom picture is what they looked like when they finished.


Did I mention that they turned out really good?  The beans were so nice and tender, and all of the flavors did come together nicely.  I did taste them again about a half hour before taking them out of the oven just to see if I needed to add anything else, and I did add a touch more salt & vinegar & an extra squirt of ketchup.  If you like them sweeter, go ahead & add a little more brown sugar, or use dark brown sugar instead of light brown sugar for more of a molasses sweetness.  Hmmm.  I may have to try that next time. 

Hope you all enjoy these as much as we did. 

Wednesday, February 29, 2012

Working on the blog/ Test Post

I've been working to add a Pinterest Pin to my posts, so wanted to test it out to see if I was able to get the code inserted properly.  I do now have a "Pin It" button on the right side of my blog.  So if you have liked some of my previous posts and want to pin them go ahead.  They are ready to be pinned.

The other code I was working with was supposed to put a pin it button on each post so you don't even have to go to the side of the blog.  Let's see if it worked.

Nope.  Didn't work, so I'll try to get it fixed tomorrow.  I did get a button inserted on the bottom of each post so if you want to post to twitter, facebook or google plus.

Saturday, February 25, 2012

Homemade Oatmeal Waffles

One of my friends asked me the other day if I had a waffle recipe that I liked.  I told her that I had an oatmeal pancake recipe that we really liked, but I had never thought to try it in the waffle maker.  Well, today I corrected that, and the mix worked out really well.  So well, in fact that we had no leftovers.  It could also be that it's been a long time since I've made waffles, but either way I was happy with them.

For the Oatmeal dry mix of this recipe you will need:

5 cups Unbleached All Purpose Flour (Bleached will work the same, I just don't think it's necessary)
1 cup Old Fashioned Oatmeal (the fast cooking stuff should work fine here as well, just not my preference)
1 cup Cornmeal (I used yellow, white is fine as well)
1 cup Ground Flax (I use this brand found on Amazon) I'll talk a little about flax later in this post.
1/2 cup Sugar  ( I use cane sugar)
3 Tbsp. Baking Powder
1 Tbsp. Salt
 
For the batter of this recipe you will need: 

2 Tbsp. Butter, melted (I put this in the bowl first & then melt it in the microwave before adding the other ingredients)
2 Cups Oatmeal Dry Mix from above
1 Cup Milk (I use 2%, you can use what you regularly buy for your house)
2 Eggs


Put all of your dry ingredients into a bowl and mix together until well combined.


 I used a whisk, but a spoon would work fine as well.

 This is what the dry mix looks like when I finished mixing it.  If you want the oatmeal broken up more, you can run your mix through a food processor, but my family likes it the way it's done above.  I store the extra dry mix in a plastic container in a cool, dark place (one of my kitchen cabinets), but you could also use a zipper bag or canning jar.  Another friend of mine also recently told me that some of the creamer bottles are clear under the label, so take off the label & you can store you pancake mix in one of those, too.  If you have enough jars, you could even measure out 2 cup portions that you could add the eggs, milk & butter to later & just shake to combine.


Here is my batter with the melted butter at the bottom so it's not as visible.


Here it is after mixing.  I would give it about a few minutes to rest before making the first waffles (or pancakes).  This will help the cornmeal & oatmeal not to be quite as crunchy/chewy.


I put a couple of large scoops into my waffle maker.  I did spray it first with some non-stick spray.


The light has gone off telling me it's done now.  


Here is the finished waffle on my cooling rack.  It was only there long enough for the picture.  One of the kids came & ate it shortly after this pic was taken.  In the past, I have frozen leftover waffles & then just popped them into the toaster in the mornings when we've wanted to have them.  This would be a great recipe to do that with.

I want to let you all know I tend to go lighter on the sugar in the mix because my family tends to put cinnamon sugar or maple syrup on their pancakes/waffles.  If you find the mix not sweet enough for your family, increase the sugar a bit.  If you find it too sweet, reduce it.  This is part of that recipes are guides I told you all about before.  Also, if you tend to like thinner pancakes, add some more milk to the mix.  I like my pancakes think & fluffy, so I tend to add just the cup of milk.


I told you above in the ingredient listing I would talk a little about flax.  Flax is one of those really good for you whole grains and it's one of the highest plant based source of omega - 3s.  The reason I use it ground is because it's the best way for your body to absorb the nutrients.  It's really hard for your teeth to crack into those whole flax seeds. They look pretty, but they are hard for your body to get the nutrition out of.  I had a hard time finding a reasonably priced package of the ground flax at the stores in my area, so that's why I wound up using the Subscribe & Save option at Amazon.  You may be fortunate enough to have a better selection in your area.  Besides this recipe, I use the ground flax in pizza and bread doughs, and I have been known to slip a little bit into cookie batter from time to time.  It's just an easy way to add some extra protein and fiber to your baking without changing the flavor.

Hope you all enjoy the waffles as much as we did!  Let me know if you have any questions/comments about it.


This post contains an Affiliate link.  When you use it, you help to support this blog.  You can find my Disclosure Policy here.

Tuesday, February 14, 2012

Monster Cookies

For this recipe you will need:
 
5 C. All Purpose Flour
2 tsp. Baking Soda
2 tsp. Salt
2 sticks Butter
2 sticks Margarine
1 & 1/2 C. Granulated Sugar
1 & 1/2 C. Packed Light Brown Sugar
1 tsp. Vanilla Extract
1 18 oz. Jar Crunchy Peanut Butter (a 16 oz jar is ok, too)
4 Eggs
1 & 1/2 C. Oatmeal
1 C. Bittersweet Chocolate Chips
1 8 oz. pkg. Heath Bits 'O Brickle Toffee Bits, or 1Multi-pack of Heath Bars (see Note)
1 14 oz. Package M & M's

Preheat oven to 375 F Degrees.


Combine flour, baking soda, and salt in a bowl & set aside.


   Beat butter, margarine, sugar, brown sugar & vanilla in a large mixer bowl. 


Add peanut butter and mix well. 


  Add eggs one at a time and beat well after each addition. 


  Gradually beat in flour mixture, add oatmeal, chips, bits (or Heath Bar pieces), and M&M's.
 

 Add the M&M's last and mix minimally so you don't break the shells.  This can be done by hand, but it is a BIG batch of dough, so takes some muscle to get it mixed in.


 Drop by rounded tablespoon onto baking sheets lined with parchment paper or silicone baking mats.  I really like the baking mats because they are washable & reusable.  They are also non-stick.  These can be purchased from Amazon,  as well as from other retailers. Bake for 12 - 16 minutes or until golden brown in your 375 F oven.  I like to rotate the pans half way through cooking moving the one on the top rack to the bottom & turning it at the same time.  It just gets that nice crispy on the outside, soft on the inside cookie going.  Let stand for 2 minutes.  Remove to a wire rack to cool completely. 

Makes approx. 7 dozen cookies.

 **Note: If you can afford it, I really like using the whole Heath bars broken into pieces in these cookies.  The overall flavor is just so much better & richer.

 Now, if you don't want to bake all of these cookies the day you make the dough, don't.  I usually make a big batch of this dough and then freeze off portions in freezer bags to take out when we want some cookies around.  I also will make them for Christmas cookie exchanges, potlucks, or other things that seem to pop up from time to time.  It's nice to be able to pull of homemade cookies in less than a half hour when you need to.  The dough can be thawed overnight in the refrigerator the day before baking.  I have been known to cut off chunks of mostly frozen dough from time to time and bake those off as well.  If you're really organized, you can scoop the dough out onto a cookie sheet, freeze the dough balls, and then store them in the freezer bags.  Then you'll have your frozen dough pucks ready to go when you want cookies. 

Hope you all enjoy these cookies as much as my friends and family have when they eat them!


This post contains an Affiliate link.  When you use it, you help to support this blog.  You can find my Disclosure Policy here.


My Disclosure Policy

So, the disclosure policy thing is something that has come up since the first time I blogged, and now that I am blogging again it's time I go ahead and address it.  I will start talking about where I have gotten some of my kitchen items from, and as a result, will probably post a link to a store where you can get the same item or something similar.
I am an associate with Amazon, and will earn a small percent of anything you purchase on there.  It is less than the sales tax in the state that I live in, but it's nice to know that by clicking the link and making a purchase you are supporting my site as well.  I appreciate the support for my blog, and your making a purchase of something I have posted about tells me that you like what I am blogging about.
I also am affiliated with a couple of other companies besides Amazon, and will post a link to this disclosure policy once I make sure the links still work.  I am not doing this blog to earn money, but to share my cooking style and recipes with you all.  To earn a few bucks doing something I enjoy is a nice perk, but I won't post something that earns me money but doesn't make sense for the blog.  I know I've seen other bloggers do this and it's a bit annoying when they are promoting something that you know really isn't worth the money. 
I hope that all of you are enjoying trying out some new foods & recipes, and that I am helping to make cooking fun and enjoyable for you.  If you have any additional questions, please feel free to e-mail me through the blog (chefcatnky (at) gmail (dot) com).
Thanks again for reading, and I'll be posting some more recipes soon!

All works copyrighted under federal copyright law. All rights reserved.

Last updated 2/14/2012

Thursday, January 26, 2012

Hummus

For this recipe you will need:

1/2 to 3/4 cup Garbanzo Beans (Chickpeas), dried
7 Tbsp. Olive Oil
6 Tbsp. Lemon Juice
3 Garlic Cloves, peeled
1 tsp. Sesame Oil
Salt to taste
**Optional: 1/4 c. Plain Greek Yogurt


I want to start by saying Hummus usually has Tahini in it, which is a paste usually made from sesame seeds & olive oil.  It can be found in most of your local grocery stores, I usually forget to buy it.  I do, however, usually have a bottle of Sesame Oil in my fridge & find it can be a nice substitute when combined with the olive oil.  Feel free to make hummus both ways & make up your mind as to how you like it.  I do recommend keeping Sesame Oil in the fridge after it's open so it doesn't go bad as fast.  You will notice that it does get a little cloudy when cold, that's perfectly normal.  As it comes back to room temperature the cloud will disappear.  If you decide to leave it at room temperature, just be aware that it will probably oxidize in about a month or so.

You may also have noticed that I use dried chickpeas in my recipe.  I just find that they have a better flavor and add a nuttiness to the finished product.   I also like to use the cooking liquid in the hummus to help reduce the amount of fat/oil I'm adding.  You probably could used canned beans (drained & rinsed) and vegetable broth, but you'd have to play around with the amounts/ingredients a bit.

Start by putting your beans in a pan and adding water to cover the beans by a couple inches.  Throw in a pinch of salt.  Bring the beans to a boil, reduce heat to medium (to simmer the beans, you still want a couple of bubbles rising to the surface) for an hour to 90 minutes.  Go ahead & taste one of the beans to make sure they are done, but blow on it first, so you don't burn your mouth!  You don't want them to be mushy, you want them to have some bite/texture to them, but you don't want them hard either.  Basically the texture is like a soft peanut.

Here are what my beans looked like in the pan:


Pour around 1 cup of the cooking liquid off the top of the beans, and set aside.  Drain the beans the rest of the way.  Place beans into a food processor.  Add garlic, 4 Tbsp. of the lemon juice, the sesame oil, 1/2 cup of the cooking liquid, and 4 Tbsp. of the olive oil.  Pulse and then run the machine until a smooth paste is formed.  you will probably need to scrape down the bowl at least one time.  Now taste what you have.  Adjust as needed.  Add more lemon juice if it needs to be a little more tart, add more salt if you need it.  If you want more creaminess, add more olive oil & some more of the cooking liquid.  **Here is where you can also add that little bit of greek yogurt.  It will provide an extra creaminess to the texture without adding more fat.

If you want more garlic, go ahead & add more!  Pulse again and taste.  It should be close.  Adjust seasonings again if you need to, otherwise, go ahead & put it into a serving dish and enjoy!  I have heard about people adding kalamata olives or roasted red peppers to their hummus.  I haven't tried it, but it you want to add them, give it a try.  Just remember to adjust your salt down if you're using olives.  You can also add a dash of cumin & ground red pepper as well.

Here is what mine looked like in the food processor:  


Since I used my small food processor, it did take a couple of batches to do the amount of beans I had.

 And here is what my finished Hummus looked like:


I like to eat my hummus with Pita Chips & carrots.  I know others that like colored peppers, celery, or pretzels.  You can also use it as a spread on sandwiches.  Let me know what you think if you try this recipe out! 

Sunday, January 22, 2012

Ham & Cheese Quiche

For this recipe you will need:

1 prepared pie crust, I used a Pillsbury refrigerator crust, but you could easily use one of the frozen crusts that come in the pan in the freezer section.
1/2 - 1 LB of Diced Ham
1/2 medium sized onion, diced
6 eggs
1/2 cup Milk (I used 2% since that's what we have in the house)
1/2 cup Cheddar Cheese, shredded
Salt and Pepper to taste, Dried Herbs (or fresh) of your choice


Quiche is such a great, easy dinner.  You can fill it with so many wonderful things, especially leftovers you may want to try a different way.  I originally wasn't going to post this to the blog, but since I had a couple of my facebook friends ask for the recipe, figured others would be interested and that I would share.  Preheat your oven to 375 F.

The first thing I did was cooked my onions in a small saute pan over medium heat on the stove until they were translucent with a little bit of browning, about 10 minutes.  These probably would cook in the oven in the quiche, I just don't like my onions overly crunchy coming out of the oven.  I set my onions aside and then put the ham into the pan that the onions were in.  I turned the pan up to medium high and sauteed the ham a little to remove the extra water.

When ham is processed, water is typically added to it.  My ham we purchased from a local butcher, so it is minimally processed, but I had pulled it out of the freezer, so knew it probably still had a little liquid in it.

While the ham was in the pan, I went ahead and scrambled the eggs with the milk, salt, pepper, and I used several shakes of a Fine Herb Blend from Penzeys Spices.   

So, toss the ham and onions together, and put them into a raw pie crust.  Pour on the eggs, and then top with the cheese.  Place into the oven for 30-40 minutes.  I would suggest either putting your pie pan on a cookie sheet, or putting a cookie sheet on the oven rack under your quiche.   This way if things bubble over a bit the clean up is much easier than having to clean the entire oven.  A  knife inserted into the center of the quiche should come out cleanly.  Well, you might pull out a little melted cheese, but you shouldn't feel a soft, gooey center and see egg come out on your knife.

Bear in mind that if you have a smaller crust/pan than mine you may not use all of the eggs, or if you have a super deep dish crust you may need an extra one or two.  Also if you don't like cheddar cheese or happen to have a different cheese or filling in your house, go ahead & use them!  This is a suggestion based on what we had for dinner last night. 

*edit - I forgot to mention if you want to reduce the calories a bit make a crust-less quiche.  I used to make one with imitation crab & scallions without a crust that was pretty tasty on its own.


Here is what my finished quiche looked like: 


And a single piece.  SO tasty!

I served it with Honey Corn Bread, and wished I had a salad to round it out the rest of the way.   We had apple pieces instead. Just remembered we actually had grapes I found on sale yesterday.  I also had roasted a couple of beets I had in the fridge with the other half of the onion.  I still think a salad would have been nice.

So, still think Quiche would be hard to make?  What types of quiche do you enjoy most?

A Reader's Question: How do I Blanch Vegetables?

I had one of my friends text me this morning asking how to freeze broccoli, and I asked her if she knew how to blanch in response.  She said she didn't know, so I told her I was going to turn it into a blog post.  Too much to type in a text, and I think it's something that others would want to learn about.

This basic guide should help you when preserving your fresh vegetables.  I used this method quite a bit this past summer, and I'm sure I'll get some pictures taken this coming summer to update this post.

First things first, what do you need to blanch vegetables.  Well, you'll need a cutting board & knife, alarge pot of boiling water, a colander or spider tool (basically a handheld strainer...works better than a slotted spoon, especially if you're working with a bigger batch of vegetables), a large bowl filled with cold water and ice, and a sheet pan.  Once your vegetables are frozen you will also need a bag or container to store them in.

First things first, wash and cut your broccoli into florets, or spears or whatever size you know you will want to use it in later. 

Second, put broccoli into your pot of boiling water.  Now here comes the tricky part.  Depending on the size of your broccoli will depend on how long you boil it for (usually at least 2 minutes).  Watch for the color change.  The color of the broccoli will turn a brighter green.  Once you see that color change, immediately pull it out of the boiling water using your spider tool, or drain into your colander.  Shake off the excess hot water & immediately put it into your large bowl.  The reason you have water in the bowl with your ice is to transfer the cold faster.  The idea is to stop the cooking process as quickly as possible.  Go ahead & move the broccoli in the cold water to speed the process.  Another thing that will help speed the process is to add additional ice once you see how fast your other ice is melting, or to even add a little salt to the water.

You will see the ice melt slow as your product cools, and you can leave it in the cold water for a minute or two.  The reason I prefer the spider tool to the colander method is because you can do more than one batch of vegetables in your boiling water.  First corn, then cauliflower, then broccoli or beans or peppers.  It's easiest to learn what to look for with the green vegetables first.  Then you can get a better feel for the timing of the piece size with your equipment.  If you boil for too long, your vegetables cook too long and will get mushy.

So, once your broccoli is cooled pull it out of the cold water with the spider tool or drain into a colander.  Pick out any extra ice by hand.  Spread into an even layer on your sheet pan and then place in the freezer for about an hour.  You can leave it in there overnight as well & then pack off your broccoli in the morning.  Just depends on how many pans you're putting into your freezer.

Finally, package your broccoli into freezer storage bags, vac seal, or use containers.  Don't forget to label & date your product so you know what to eat first.  First in, First out is a saying we learned in school and it makes sense to use up your oldest product first. 

Hope this helps simplify the blanching process.  Let me know if something isn't clear!


Wednesday, January 18, 2012

Pfannekuchen (A German wrap or pancake)

This recipe was shared with me by one of my friends, Regina, who is German from the area near Frankfurt.  She says that the recipe originally came from her Grandmother's 1957 Bertelsmann Kochbuch.

For this recipe you will need:

2 1/2 cups Flour
2 1/2 cups Milk
3 Eggs
Salt to taste

Mix all ingredients together in a bowl.  It's ok to put the bowl in the refrigerator if you can't cook them off right away.  You do want to make sure your batter doesn't have any lumps & that it's thinner than what is shown in my picture below.  Just keep adding Milk.  It's ok if you need more than what the recipe calls for.  You want it to be like a very thin pancake batter, slightly thicker than crepe batter.


You will add about 1 1/2 Tbsp. oil & 3/4 c. batter to the pan to make one "pancake".  Make sure that your pan is over a medium high heat.  You don't want it on high or you will burn one side of your pancake before you have a chance to flip it. 


Put your oil in the pan & spread it over the whole surface.  Ladle or use a cup measure to put your batter into the pan and roll the pan to get it to spread quickly. 


As you can see from the pictures, the batter gets darker as it cooks.  Use a spatula or tongs to make sure that your Pfannekuchen isn't sticking.  The easiest way to flip it is to slide it towards the front of the pan & flip it in the air catching it back in the pan.  Kind of like what you see some of us chefs do with an omelette.  You can probably try flipping it with a large spatula, let me know if it works for you.  Regina flipped it, so that's how I do it.  Just keeps things simple.


Once flipped, let the other side cook & then place on a plate in a stack or on a cooling rack in a stack.  Here are what a couple of mine looked like.  My pan was getting a bit hot as you can see from this bottom pic.  I like the lighter brown coloring like above better, but they both tasted good.


Now, what to fill it with....well for this time I used a round steak because I had one in the freezer.  I cooked it in that same 375 F oven that I had used for the cauliflower & brussel sprouts.  I put salt & pepper on it and cooked it for about 20 minutes or so. 


I then sliced it thin and put some onions & mushrooms I cooked up with it.  I'll post the recipe for those next. 


Fill it kind of like you would fill a tortilla for a fajita.  Roll it up & enjoy!  We did.


Other ideas for filling these?  How's about grilled chicken or steak, lunch meat & cheese with lettuce and tomato, a vegetarian option with roasted vegetables.  My friend Regina also does one with Nutella that she sprinkles on the top with cocoa powder & powdered sugar.  You could fill them with pie filling, chocolate chips, peanut butter & bananas.  You could also  turn them into a breakfast on the go with a slice of bacon and eggs or part of an omelette with cheese or the possibilities just keep on going.  Let me know what combinations you come up with!