


I had one of my friends text me this morning asking how to freeze broccoli, and I asked her if she knew how to blanch in response. She said she didn't know, so I told her I was going to turn it into a blog post. Too much to type in a text, and I think it's something that others would want to learn about.
This basic guide should help you when preserving your fresh vegetables. I used this method quite a bit this past summer, and I'm sure I'll get some pictures taken this coming summer to update this post.
First things first, what do you need to blanch vegetables. Well, you'll need a cutting board & knife, alarge pot of boiling water, a colander or spider tool (basically a handheld strainer...works better than a slotted spoon, especially if you're working with a bigger batch of vegetables), a large bowl filled with cold water and ice, and a sheet pan. Once your vegetables are frozen you will also need a bag or container to store them in.
First things first, wash and cut your broccoli into florets, or spears or whatever size you know you will want to use it in later.
Second, put broccoli into your pot of boiling water. Now here comes the tricky part. Depending on the size of your broccoli will depend on how long you boil it for (usually at least 2 minutes). Watch for the color change. The color of the broccoli will turn a brighter green. Once you see that color change, immediately pull it out of the boiling water using your spider tool, or drain into your colander. Shake off the excess hot water & immediately put it into your large bowl. The reason you have water in the bowl with your ice is to transfer the cold faster. The idea is to stop the cooking process as quickly as possible. Go ahead & move the broccoli in the cold water to speed the process. Another thing that will help speed the process is to add additional ice once you see how fast your other ice is melting, or to even add a little salt to the water.
You will see the ice melt slow as your product cools, and you can leave it in the cold water for a minute or two. The reason I prefer the spider tool to the colander method is because you can do more than one batch of vegetables in your boiling water. First corn, then cauliflower, then broccoli or beans or peppers. It's easiest to learn what to look for with the green vegetables first. Then you can get a better feel for the timing of the piece size with your equipment. If you boil for too long, your vegetables cook too long and will get mushy.
So, once your broccoli is cooled pull it out of the cold water with the spider tool or drain into a colander. Pick out any extra ice by hand. Spread into an even layer on your sheet pan and then place in the freezer for about an hour. You can leave it in there overnight as well & then pack off your broccoli in the morning. Just depends on how many pans you're putting into your freezer.
Finally, package your broccoli into freezer storage bags, vac seal, or use containers. Don't forget to label & date your product so you know what to eat first. First in, First out is a saying we learned in school and it makes sense to use up your oldest product first.
Hope this helps simplify the blanching process. Let me know if something isn't clear!
Sunday, January 22, 2012

Wednesday, January 18, 2012
Pfannekuchen (A German wrap or pancake)
This recipe was shared with me by one of my friends, Regina, who is German from the area near Frankfurt. She says that the recipe originally came from her Grandmother's 1957 Bertelsmann Kochbuch.
For this recipe you will need:
2 1/2 cups Flour
2 1/2 cups Milk
3 EggsSalt to taste
Mix all ingredients together in a bowl. It's ok to put the bowl in the refrigerator if you can't cook them off right away. You do want to make sure your batter doesn't have any lumps & that it's thinner than what is shown in my picture below. Just keep adding Milk. It's ok if you need more than what the recipe calls for. You want it to be like a very thin pancake batter, slightly thicker than crepe batter.

You will add about 1 1/2 Tbsp. oil & 3/4 c. batter to the pan to make one "pancake". Make sure that your pan is over a medium high heat. You don't want it on high or you will burn one side of your pancake before you have a chance to flip it.


As you can see from the pictures, the batter gets darker as it cooks. Use a spatula or tongs to make sure that your Pfannekuchen isn't sticking. The easiest way to flip it is to slide it towards the front of the pan & flip it in the air catching it back in the pan. Kind of like what you see some of us chefs do with an omelette. You can probably try flipping it with a large spatula, let me know if it works for you. Regina flipped it, so that's how I do it. Just keeps things simple.


Now, what to fill it with....well for this time I used a round steak because I had one in the freezer. I cooked it in that same 375 F oven that I had used for the cauliflower & brussel sprouts. I put salt & pepper on it and cooked it for about 20 minutes or so.

I then sliced it thin and put some onions & mushrooms I cooked up with it. I'll post the recipe for those next.

Fill it kind of like you would fill a tortilla for a fajita. Roll it up & enjoy! We did.

Other ideas for filling these? How's about grilled chicken or steak, lunch meat & cheese with lettuce and tomato, a vegetarian option with roasted vegetables. My friend Regina also does one with Nutella that she sprinkles on the top with cocoa powder & powdered sugar. You could fill them with pie filling, chocolate chips, peanut butter & bananas. You could also turn them into a breakfast on the go with a slice of bacon and eggs or part of an omelette with cheese or the possibilities just keep on going. Let me know what combinations you come up with!
A reader's question: What kind of potatoes did you use for the mashed potatoes?
Well, the answer to this question is I'm not sure. I used either Russet or Yukon Gold potatoes. They work really well with both. We get a produce delivery box bi-weekly from Full Circle Farms, and I know that's where my potatoes came from. If you decide to sign up please tell them Catherine Skinner sent you so we can both get a $10 credit. :)
Anyhow, back to the potatoes. The yukon golds are usually a bit more yellow fleshed, so I'm inclined to think that I used russet potatoes. I'm guessing I used around 3#. I also tend to roast the yukons since they are a bit more delicate, creamy potato.
I also did have another question that I've answered in the comments section of the post. The brussel sprout recipe also has some good comments/questions as well.
Finally, feel free to enjoy the cauliflower roasted on its own. Add some herbs or garlic if you like! Hope this clarifies things a bit. Keep the questions coming!
Anyhow, back to the potatoes. The yukon golds are usually a bit more yellow fleshed, so I'm inclined to think that I used russet potatoes. I'm guessing I used around 3#. I also tend to roast the yukons since they are a bit more delicate, creamy potato.
I also did have another question that I've answered in the comments section of the post. The brussel sprout recipe also has some good comments/questions as well.
Finally, feel free to enjoy the cauliflower roasted on its own. Add some herbs or garlic if you like! Hope this clarifies things a bit. Keep the questions coming!
Tuesday, January 17, 2012
Roasted Cauliflower Mashed Potatoes
Here is another side dish we had with our dinner the other night. For some odd reason, my kids won't eat mashed potatoes that don't have roasted cauliflower in them. So, here is a small head of cauliflower that I've prepped to go into the oven with salt & pepper and drizzled with olive oil.

I already had the oven set to 375 F for when I was making the brussel sprouts, so these fit in the oven just fine. I baked them for 35 - 40 minutes until it was nice and tender. You can check it by looking at the nice lightly browned color & when you insert a knife it should go in easily.


Once I got the cauliflower in the oven, I got the potatoes boiling. A lot of the time when I make mashed potatoes, I also roast the potatoes, but this time I decided to boil them. Once your salted water with the potatoes in it starts to boil, it usually takes about 20 minutes for them to be cooked. Again, an inserted insert knife should go in easily. Drain & return them to the pan & burner that it was on (this will help the butter to melt & the potatoes to stay warm).

Yes, I also left the skins on this time as well. You can peel them before you boil them if you don't want the skins in your mashed potatoes. When I roast them, I leave the skins on and then peel them before mashing. I freeze the skins and then pull them out for loaded potato skins for lunches.

Now here's where I'm going to tell you NOT to do what I did. I don't make mashed potatoes all that often & I forgot I needed to separate the cauliflower and put them into a separate food processor with some milk. Once those are processed into a fine paste they can go into the pot.

What did I do? I used my immersion blender & that wound up creating too much shear for the potatoes, making them a bit on the gummy side. They were still tasty, but the texture would have been better if I had used my old fashioned hand masher & added in the already pureed cauliflower.

Here is what my final product looked like. I used 1 stick of butter and a generous 1/2 cup of milk in this batch. I also added salt to taste. Sometimes I also add pepper, this time I didn't. Some purists chefs will say to only use white pepper so you can't see it as much in the potatoes. I say use what you & your family like.
All in all, this batch turned out pretty tasty, and we have been enjoying leftovers warmed up in the microwave with some melted shredded cheese on them. You could also add some bacon crumbles, sour cream, green onions, or whatever you have on hand that you like to have with potatoes.
Let me know what you all think of these & what combinations you come up with to use the leftovers with!

I already had the oven set to 375 F for when I was making the brussel sprouts, so these fit in the oven just fine. I baked them for 35 - 40 minutes until it was nice and tender. You can check it by looking at the nice lightly browned color & when you insert a knife it should go in easily.


Yes, I also left the skins on this time as well. You can peel them before you boil them if you don't want the skins in your mashed potatoes. When I roast them, I leave the skins on and then peel them before mashing. I freeze the skins and then pull them out for loaded potato skins for lunches.

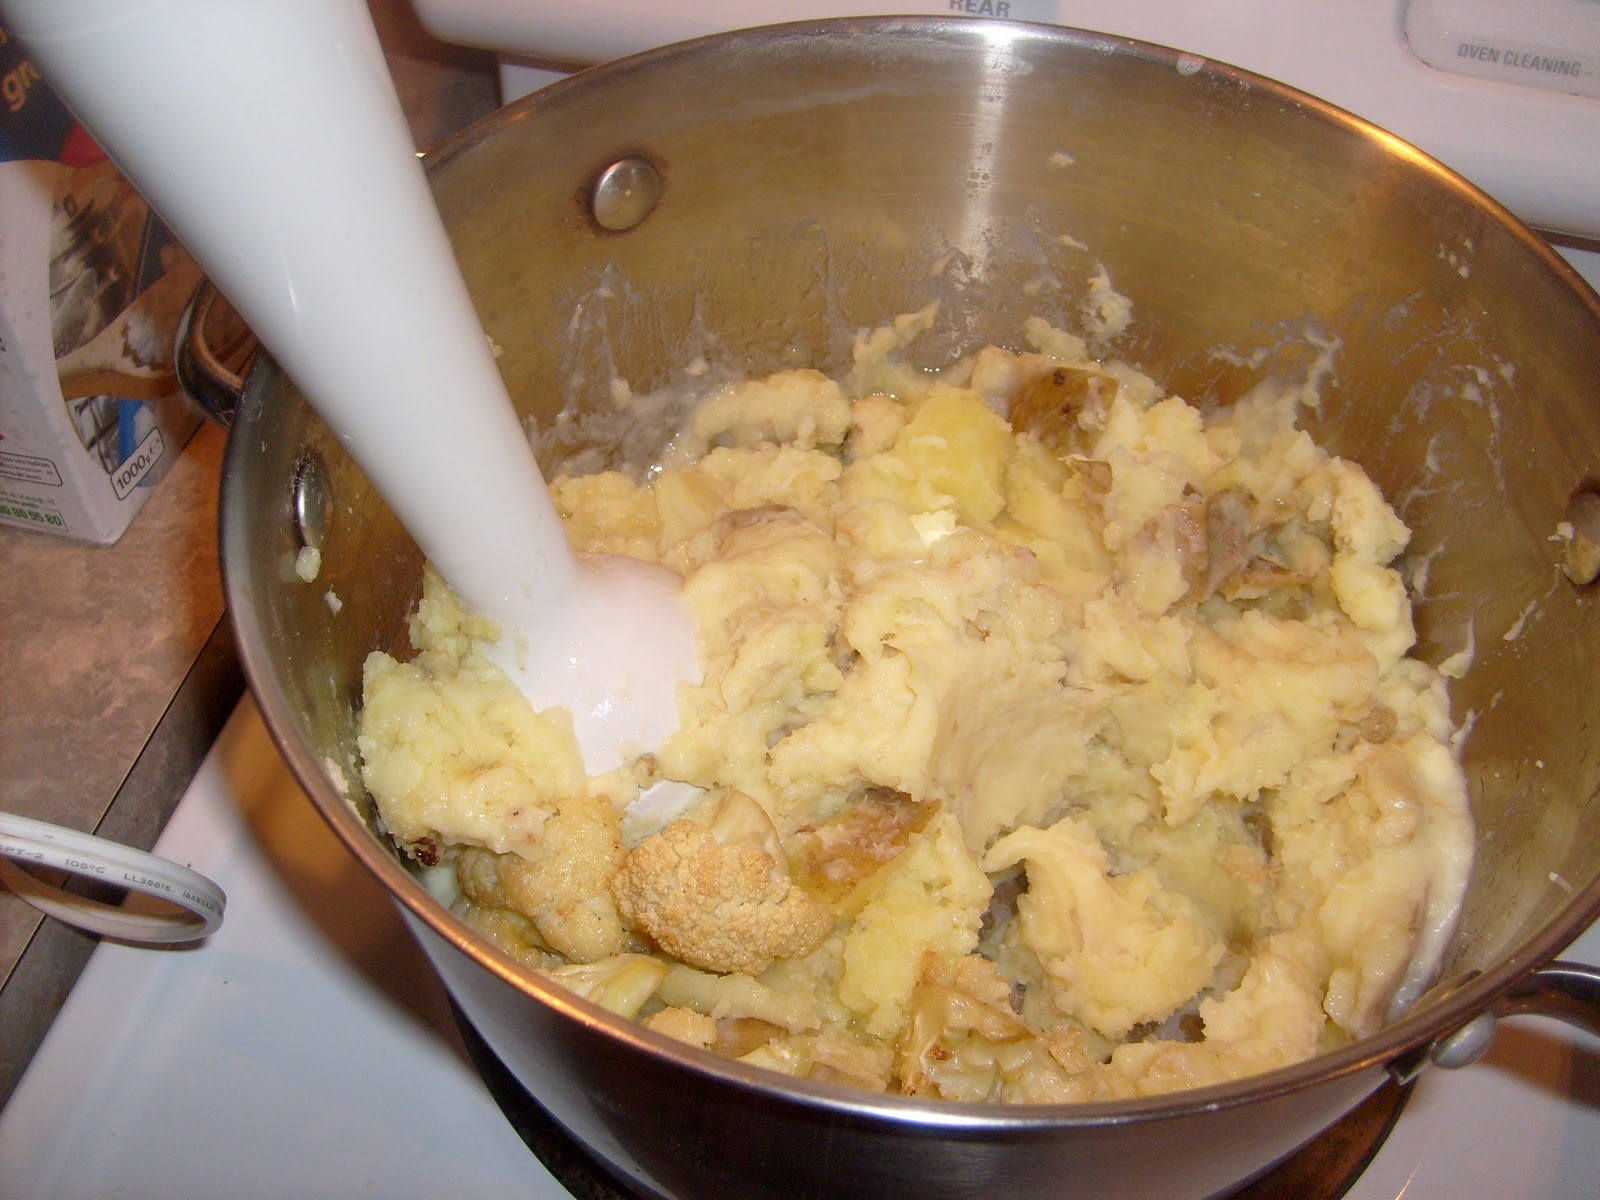
What did I do? I used my immersion blender & that wound up creating too much shear for the potatoes, making them a bit on the gummy side. They were still tasty, but the texture would have been better if I had used my old fashioned hand masher & added in the already pureed cauliflower.

All in all, this batch turned out pretty tasty, and we have been enjoying leftovers warmed up in the microwave with some melted shredded cheese on them. You could also add some bacon crumbles, sour cream, green onions, or whatever you have on hand that you like to have with potatoes.
Let me know what you all think of these & what combinations you come up with to use the leftovers with!
Monday, January 16, 2012
Caramelized Brussel Sprouts
Thought I would share a recipe that several people have asked me for after trying these at my house. I know that my husband always thought he didn't like brussel sprouts until I started to make them this way. Now, he would eat them every night of the week if I made them that often.
First things first, do yourself a favor & buy some FRESH brussel sprouts. Take a small amount off the bottom, remove any outside leaves that still look dirty after washing, and cut them in half. For this recipe, I'm guessing I used about a pound of sprouts, but I didn't weigh them first.
Place them in an oven safe saute pan, add a Tablespoon or two of Olive Oil, some salt and pepper. Preheat your oven to 375 F.

Turn the heat up to Medium Hi, almost Hi and toss them around ever minute or so, just not constantly. You want your sprouts to get some browning/caramelization going on them.
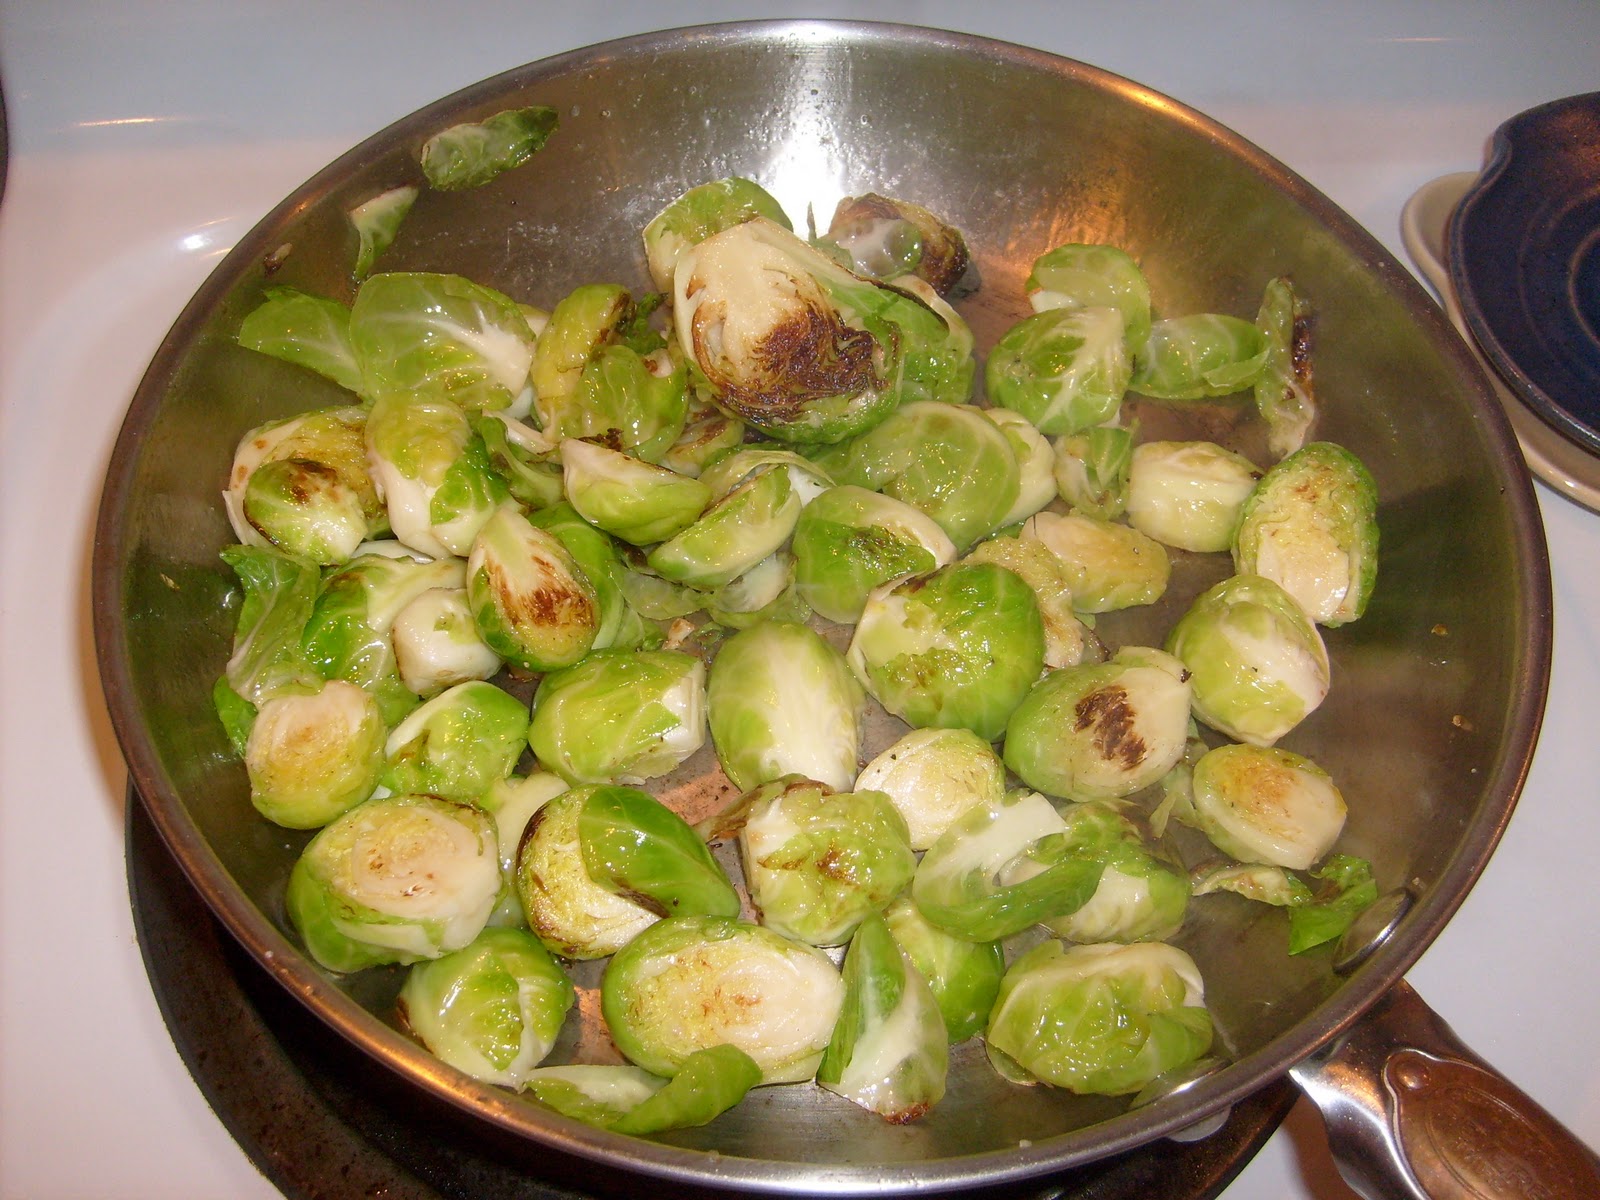
When the sprouts have some nice browning on them and start to stick to the pan a little, it's time to deglaze the pan.

Add a little bit of water to the pan & toss around your spouts a bit (or use a spoon). For a batch this size you really don't want to use more than 1/4 cup of water. You really don't want to make the sprouts soggy. Most of the water should steam off instantly really leaving no water in the pan (like in above picture).

Place the pan in your preheated oven and let them finish cooking for about 20 minutes.

This is how mine looked after they came out of the oven last night. They usually turn out a little brighter, so I'm thinking I got a touch too much water in my pan. They were still good & we had no leftovers, so they must have been acceptable. My daughter has even decided that she likes sprouts from time to time. My son is still working on it...
Hope you all enjoy this easy side dish. Give them a try, you just might like it! You can put a little more olive oil on them before you serve them & adjust the salt & pepper to your taste. I'm looking forward to hearing your comments & questions!
Friday, January 13, 2012
Update from a reader & a couple of new questions.
I wanted to let you all know that the loaf pan worked for the Monkey Bread recipe. Also the cooking at 325 F for 35 minutes turned out to be a time that worked for her pan. So, if you don't have a bunt pan & want to try it out using a loaf pan this might be an option for you. Just be aware that different pans may require a slightly different bake time. She used the Pillsbury brand instead of Rhodes, so that's another option.
She also wanted to know some additional suggestions for the Vanilla Sugar recipe besides using it on berries. Essentially, you can use vanilla sugar in the place of regular white sugar in any recipes you want a touch of vanilla flavor added to. You can also use it in coffee, tea, or other drinks you use sugar to sweeten. You can use a coarser baking sugar when making the vanilla sugar and then use it to top muffins or cookies. You can also use a glass container to hold your sugar in; basically you want a container that won't let extra air into it. You want to keep all of the vanilla goodness inside.
Finally, I wanted to share that I made a batch of meatballs last night but I didn't make them into soup. In fact, I didn't even add any seasonings except for salt & pepper. I did use the rest of the ingredients pretty much like what I did for the soup, though. I started to brown them up, got lazy & then threw them into a 350 degree oven to finish cooking. You could bake them in the oven the whole time if you don't want to brown them on the stove. The caramelized/browned parts taste the best, but sometimes we all need an easy meal. Make your meatballs, put them on a baking sheet, and then put that into a preheated 375 degree oven for 20 minutes. Go ahead & cut one in half to see if they are done. The time will vary depending on the size of your meatballs. The reason I used a 350 degree oven to finish mine the other night was because I was getting ready to bake some muffins and I didn't want to change the oven temperature. (The muffin recipe is on the Cat's Muse facebook page for those who want it - Gingerbread Pear with dark chocolate, they were yummy).
What did I do with my meatballs the other night? I made meatball sandwiches. I took hamburger buns, put a piece of Provolone cheese on one half & then toasted them in the toaster oven. I topped them with the meatballs & some Roasted Marinara Sauce I had in the fridge (I did warm it up first before putting it on the sandwiches). Any tomato sauce you like will work. The kids didn't want sauce & one didn't want bread, so it was an easy meal for our family. I served it with chips, which we don't have very often, sauteed rainbow chard, and some fresh blueberries. The muffins were dessert.
Another option that the meatballs can be used for is the traditional spaghetti & meatballs.
Hope this answers most of the questions for now! Keep them coming. I think that the questions & answers help everyone.
She also wanted to know some additional suggestions for the Vanilla Sugar recipe besides using it on berries. Essentially, you can use vanilla sugar in the place of regular white sugar in any recipes you want a touch of vanilla flavor added to. You can also use it in coffee, tea, or other drinks you use sugar to sweeten. You can use a coarser baking sugar when making the vanilla sugar and then use it to top muffins or cookies. You can also use a glass container to hold your sugar in; basically you want a container that won't let extra air into it. You want to keep all of the vanilla goodness inside.
Finally, I wanted to share that I made a batch of meatballs last night but I didn't make them into soup. In fact, I didn't even add any seasonings except for salt & pepper. I did use the rest of the ingredients pretty much like what I did for the soup, though. I started to brown them up, got lazy & then threw them into a 350 degree oven to finish cooking. You could bake them in the oven the whole time if you don't want to brown them on the stove. The caramelized/browned parts taste the best, but sometimes we all need an easy meal. Make your meatballs, put them on a baking sheet, and then put that into a preheated 375 degree oven for 20 minutes. Go ahead & cut one in half to see if they are done. The time will vary depending on the size of your meatballs. The reason I used a 350 degree oven to finish mine the other night was because I was getting ready to bake some muffins and I didn't want to change the oven temperature. (The muffin recipe is on the Cat's Muse facebook page for those who want it - Gingerbread Pear with dark chocolate, they were yummy).
What did I do with my meatballs the other night? I made meatball sandwiches. I took hamburger buns, put a piece of Provolone cheese on one half & then toasted them in the toaster oven. I topped them with the meatballs & some Roasted Marinara Sauce I had in the fridge (I did warm it up first before putting it on the sandwiches). Any tomato sauce you like will work. The kids didn't want sauce & one didn't want bread, so it was an easy meal for our family. I served it with chips, which we don't have very often, sauteed rainbow chard, and some fresh blueberries. The muffins were dessert.
Another option that the meatballs can be used for is the traditional spaghetti & meatballs.
Hope this answers most of the questions for now! Keep them coming. I think that the questions & answers help everyone.
Wednesday, January 11, 2012
Vanilla Sugar
So, let's talk vanilla sugar. Here is a batch I made about a month ago. We get a bi-weekly organic produce delivery & they have a grocery area you can order items from . So, I ordered 2 vanilla beans one week since they had them for a decent price.
I put 4 cups of sugar into one of my taller ziploc plastic containers, dropped in my two vanilla beans, put the lid on, and then forgot about it for a couple of weeks. Here's what the vanilla beans looked like in the container:

Here's what the vanilla bean looked like when I went to pull one out when I went to make some gelato (recipe will be coming soon). I did leave the other bean in the sugar so I'll know where to find it when I need to use it:

So, this is the vanilla sugar I used on the strawberries when we had our Italian Wedding Soup a couple of weeks ago.
I also wanted to talk about another way you can make your vanilla sugar. You can go ahead and harvest the seeds from the middle of the vanilla bean using a knife or other scraper and use them in a recipe or what you have planned for them. Before you throw away the pod you can go to step one and insert the split pot into some sugar to make the vanilla sugar that way. Set aside the container for at least a couple of weeks.

When I make custard, I usually soften up the entire pod in the warm cream/milk before I put in the sugar/egg part. I take out the vanilla seeds and then put it into the custard and then discard the pod. By making my vanilla sugar first, I've re-used my pod a couple of ways before harvesting the seeds for what I want to use them in. You can't make vanilla sugar with a pod that's been soaked in milk/cream first.
Any questions?
Subscribe to:
Posts (Atom)


