


I wanted to let you all know that the loaf pan worked for the Monkey Bread recipe. Also the cooking at 325 F for 35 minutes turned out to be a time that worked for her pan. So, if you don't have a bunt pan & want to try it out using a loaf pan this might be an option for you. Just be aware that different pans may require a slightly different bake time. She used the Pillsbury brand instead of Rhodes, so that's another option.
She also wanted to know some additional suggestions for the Vanilla Sugar recipe besides using it on berries. Essentially, you can use vanilla sugar in the place of regular white sugar in any recipes you want a touch of vanilla flavor added to. You can also use it in coffee, tea, or other drinks you use sugar to sweeten. You can use a coarser baking sugar when making the vanilla sugar and then use it to top muffins or cookies. You can also use a glass container to hold your sugar in; basically you want a container that won't let extra air into it. You want to keep all of the vanilla goodness inside.
Finally, I wanted to share that I made a batch of meatballs last night but I didn't make them into soup. In fact, I didn't even add any seasonings except for salt & pepper. I did use the rest of the ingredients pretty much like what I did for the soup, though. I started to brown them up, got lazy & then threw them into a 350 degree oven to finish cooking. You could bake them in the oven the whole time if you don't want to brown them on the stove. The caramelized/browned parts taste the best, but sometimes we all need an easy meal. Make your meatballs, put them on a baking sheet, and then put that into a preheated 375 degree oven for 20 minutes. Go ahead & cut one in half to see if they are done. The time will vary depending on the size of your meatballs. The reason I used a 350 degree oven to finish mine the other night was because I was getting ready to bake some muffins and I didn't want to change the oven temperature. (The muffin recipe is on the Cat's Muse facebook page for those who want it - Gingerbread Pear with dark chocolate, they were yummy).
What did I do with my meatballs the other night? I made meatball sandwiches. I took hamburger buns, put a piece of Provolone cheese on one half & then toasted them in the toaster oven. I topped them with the meatballs & some Roasted Marinara Sauce I had in the fridge (I did warm it up first before putting it on the sandwiches). Any tomato sauce you like will work. The kids didn't want sauce & one didn't want bread, so it was an easy meal for our family. I served it with chips, which we don't have very often, sauteed rainbow chard, and some fresh blueberries. The muffins were dessert.
Another option that the meatballs can be used for is the traditional spaghetti & meatballs.
Hope this answers most of the questions for now! Keep them coming. I think that the questions & answers help everyone.
Friday, January 13, 2012

Wednesday, January 11, 2012
Vanilla Sugar
So, let's talk vanilla sugar. Here is a batch I made about a month ago. We get a bi-weekly organic produce delivery & they have a grocery area you can order items from . So, I ordered 2 vanilla beans one week since they had them for a decent price.
I put 4 cups of sugar into one of my taller ziploc plastic containers, dropped in my two vanilla beans, put the lid on, and then forgot about it for a couple of weeks. Here's what the vanilla beans looked like in the container:

Here's what the vanilla bean looked like when I went to pull one out when I went to make some gelato (recipe will be coming soon). I did leave the other bean in the sugar so I'll know where to find it when I need to use it:

So, this is the vanilla sugar I used on the strawberries when we had our Italian Wedding Soup a couple of weeks ago.
I also wanted to talk about another way you can make your vanilla sugar. You can go ahead and harvest the seeds from the middle of the vanilla bean using a knife or other scraper and use them in a recipe or what you have planned for them. Before you throw away the pod you can go to step one and insert the split pot into some sugar to make the vanilla sugar that way. Set aside the container for at least a couple of weeks.

When I make custard, I usually soften up the entire pod in the warm cream/milk before I put in the sugar/egg part. I take out the vanilla seeds and then put it into the custard and then discard the pod. By making my vanilla sugar first, I've re-used my pod a couple of ways before harvesting the seeds for what I want to use them in. You can't make vanilla sugar with a pod that's been soaked in milk/cream first.
Any questions?
Saturday, December 31, 2011
Recipes Are Guides
I'm going to head on to my soapbox for a minute here. The people who have taken a class with me have heard me say this, but I'm going to say it again. Recipes are guides. If you need to substitute something, go ahead. If you have canned chicken broth or powdered bullion instead of the better than bullion, go ahead & use what you have.
The main time I would say to follow a recipe is when baking. There is quite a bit more science involved and for a novice cook substitutions can be a challenge.
Otherwise, if you only have a half of an onion and the recipe calls for a full onion, you can probably still make it. If you don't like spinach, don't add it, or replace it with chard, or put in something else you like. If you make food that you and your family enjoy you will probably cook more. And it will probably not feel like you're working much at all.
Ok. Soapbox time is done. Hope you all are having fun doing a little cooking!
The main time I would say to follow a recipe is when baking. There is quite a bit more science involved and for a novice cook substitutions can be a challenge.
Otherwise, if you only have a half of an onion and the recipe calls for a full onion, you can probably still make it. If you don't like spinach, don't add it, or replace it with chard, or put in something else you like. If you make food that you and your family enjoy you will probably cook more. And it will probably not feel like you're working much at all.
Ok. Soapbox time is done. Hope you all are having fun doing a little cooking!
Italian Wedding Soup
Every time I make this soup, my husband always tells me he wishes I made a bigger pot.
You will need for the meatballs:
1 LB Lean Ground Beef
1/4 Milk
2/3 Cup Breadcrumbs (I'll show you how to make these if you're like me & don't have any in the house)
1 egg
1/2 Cup Parmesan Cheese, grated or shredded
1 tsp. McCormick Italian Herb Blend
1/4 tsp. Onion Powder
1/2 tsp. Garlic Powder
1/2 tsp. Salt
Ground Pepper to taste
For the Soup:
2 - 3 Tbsp. Olive Oil
1 medium sized Onion
3 medium sized Carrots
A couple handfuls of Spinach (this will cook down, so see how much you like)
1 big spoonful Better than Bullion Chicken
1 small spoonful Better than Bullion Vegetable
12 cups water
Salt & Pepper to taste
In a separate Pan:
1/2 box of Pasta - Orecchiette works nicely, for this batch I used Barilla Piccolini Mini Farfalle
Here's a look at my ingredients minus the milk, oil, water & pasta:

First things first, I needed to make bread crumbs. So, I found an Italian Style Bread in my house and put a couple of the pieces close to the end of the bread into my mini food processor and pulsed it until I had a nice coarse bread crumb.

I left them a little on the coarse side, which is fine. If you want your smaller, pulse a bit longer.

I wound up with close to a cup of bread crumbs according to the measurement on the side of my bowl, so plenty for the batch of meatballs I'm making. The extra crumbs can be stored in a container in the fridge (where they will continue to go stale), or can be put into the compost.

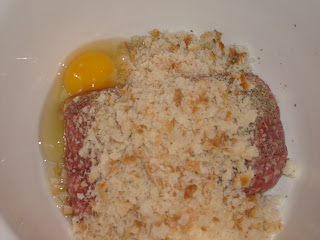
Now that I have the breadcrumbs made, I can add the rest of my meatball ingredients into a bowl. I usually mix these by hand, but I do wear disposable gloves. I just find it easier when dealing with meat to wear the gloves, and they do sell these in the grocery store now. So, mix by hand until well blended.
Now it's time to roll into balls. You can see that I got quite a lot of meatballs from my pound of meat. I like to make them small, so they fit on the spoon better. When you make a dish, it's good to think about how you're going to eat it. When we had this soup, I found that I did cut a few of the meatballs in half with my spoon, but overall they were easy to eat at just one bite. So, set those aside a minute, or jump ahead to the browning step. I chose to set them aside.

Time to cut the carrots. I usually put a slit in my carrots through the thicker part as shown here, so when I go to slice them I don't have to make smaller pieces later.

Here are my diced carrots for the soup, not too big, not too small, just a nice bite to go on a spoon.

Here is my diced onion. If anyone would like to know how to cut an onion, let me know & I will post it. Just wanted to show my piece size for now.


Here's how I started out cooking my meatballs, which turned out not to be the best way to do them. It's been awhile since I've made them & I knew not to crowd them in the pan, but since my meat was very lean, they stuck to the bottom of my soup pan. So much for my trying to save washing an extra pan.

Here's how I wound up finishing browning the meatballs. In my non stick saute pan with a little bit of oil added to it. I really like browning the meatballs first. It just adds an extra flavor dimension to the soup. Your meatballs will cook in the broth of the soup if you want to skip this step, they just might not taste as good. Once you have all your meatballs browned, set them aside on a clean plate. You never want to put cooked food in a place where you've had raw meat. That's just asking for a nasty foodborne illness.

Before we start to cook the soup, go ahead & put a pot of water to boil on another burner for your pasta. I typically add a pinch of salt to the water since it's the way I learned to cook pasta in Italy. Once your water starts boiling, you're going to add your pasta and cook it for about 2 minutes less than what the package tells you to cook it. Drain & by the time that's ready it will probably be time to add it to the soup.
So, while you're waiting for the water to boil for you're pasta it's time to get the soup started.
In the pan that you're going to make your soup in heat your olive oil (if you don't have olive oil, use vegetable or canola oil, or what you have on hand) over medium hi heat. Add your diced onion and saute until the onion is translucent about 5 minutes. We're not trying to brown the onion, just start the cooking process. Add your carrots and cook for another 2 - 3 minutes until they soften. Add the spinach and allow that to cook down for a minute. Put your meatballs in the pan and then add 12 cups of water.

Add 1 Tbsp + a couple of tsp (or just use one of the big spoons from your drawer & add that) of the Chicken Better Than Bullion, and add 1 & 1/2 tsp (or use one of the small spoons out of your drawer) of the Vegetable Better Than Bullion.

Bring temp up until a few bubbles rise to the surface and then add your drained pasta. Simmer* for 5 minutes, then TASTE your soup. This is where you adjust your seasonings by adding any salt & pepper, or if you need a touch more chicken flavor (if the soup tastes watery) add a little more of the Better than Bullion. If the soup is too salty, add a little more water. Enjoy!
*Simmer is a culinary term used frequently that I want to explain here. You will probably turn the heat back down to about medium or so on your stove, but you want to make sure that you still have some bubbles coming to the surface of your pan. Not boiling, but a light bubbling.
Here is what my finished soup looked like:


I served our soup with some strawberries I tossed with some homemade vanilla sugar. Let me know if anyone wants to know how to do this later & I'll make it a blog post.

We also had homemade baguette as well. This probably will be a future blog post. For some reason people think it's hard and time consuming to make homemade bread, stay tuned. Hopefully I'll be able to change some of your minds about this.

Let me know what you think about the soup if you give it a try!
You will need for the meatballs:
1 LB Lean Ground Beef
1/4 Milk
2/3 Cup Breadcrumbs (I'll show you how to make these if you're like me & don't have any in the house)
1 egg
1/2 Cup Parmesan Cheese, grated or shredded
1 tsp. McCormick Italian Herb Blend
1/4 tsp. Onion Powder
1/2 tsp. Garlic Powder
1/2 tsp. Salt
Ground Pepper to taste
For the Soup:
2 - 3 Tbsp. Olive Oil
1 medium sized Onion
3 medium sized Carrots
A couple handfuls of Spinach (this will cook down, so see how much you like)
1 big spoonful Better than Bullion Chicken
1 small spoonful Better than Bullion Vegetable
12 cups water
Salt & Pepper to taste
In a separate Pan:
1/2 box of Pasta - Orecchiette works nicely, for this batch I used Barilla Piccolini Mini Farfalle
Here's a look at my ingredients minus the milk, oil, water & pasta:

First things first, I needed to make bread crumbs. So, I found an Italian Style Bread in my house and put a couple of the pieces close to the end of the bread into my mini food processor and pulsed it until I had a nice coarse bread crumb.

I left them a little on the coarse side, which is fine. If you want your smaller, pulse a bit longer.

I wound up with close to a cup of bread crumbs according to the measurement on the side of my bowl, so plenty for the batch of meatballs I'm making. The extra crumbs can be stored in a container in the fridge (where they will continue to go stale), or can be put into the compost.

Now that I have the breadcrumbs made, I can add the rest of my meatball ingredients into a bowl. I usually mix these by hand, but I do wear disposable gloves. I just find it easier when dealing with meat to wear the gloves, and they do sell these in the grocery store now. So, mix by hand until well blended.

Now it's time to roll into balls. You can see that I got quite a lot of meatballs from my pound of meat. I like to make them small, so they fit on the spoon better. When you make a dish, it's good to think about how you're going to eat it. When we had this soup, I found that I did cut a few of the meatballs in half with my spoon, but overall they were easy to eat at just one bite. So, set those aside a minute, or jump ahead to the browning step. I chose to set them aside.

Time to cut the carrots. I usually put a slit in my carrots through the thicker part as shown here, so when I go to slice them I don't have to make smaller pieces later.

Here are my diced carrots for the soup, not too big, not too small, just a nice bite to go on a spoon.

Here is my diced onion. If anyone would like to know how to cut an onion, let me know & I will post it. Just wanted to show my piece size for now.

Here is the spinach. I had a half of a bag of baby spinach left over from something else I was cooking, so it wound up being 2 larger handfuls for this batch of soup. I cut through it each way so that pieces would also fit on a spoon nicely as well.

Here's how I started out cooking my meatballs, which turned out not to be the best way to do them. It's been awhile since I've made them & I knew not to crowd them in the pan, but since my meat was very lean, they stuck to the bottom of my soup pan. So much for my trying to save washing an extra pan.

Here's how I wound up finishing browning the meatballs. In my non stick saute pan with a little bit of oil added to it. I really like browning the meatballs first. It just adds an extra flavor dimension to the soup. Your meatballs will cook in the broth of the soup if you want to skip this step, they just might not taste as good. Once you have all your meatballs browned, set them aside on a clean plate. You never want to put cooked food in a place where you've had raw meat. That's just asking for a nasty foodborne illness.

Before we start to cook the soup, go ahead & put a pot of water to boil on another burner for your pasta. I typically add a pinch of salt to the water since it's the way I learned to cook pasta in Italy. Once your water starts boiling, you're going to add your pasta and cook it for about 2 minutes less than what the package tells you to cook it. Drain & by the time that's ready it will probably be time to add it to the soup.
So, while you're waiting for the water to boil for you're pasta it's time to get the soup started.
In the pan that you're going to make your soup in heat your olive oil (if you don't have olive oil, use vegetable or canola oil, or what you have on hand) over medium hi heat. Add your diced onion and saute until the onion is translucent about 5 minutes. We're not trying to brown the onion, just start the cooking process. Add your carrots and cook for another 2 - 3 minutes until they soften. Add the spinach and allow that to cook down for a minute. Put your meatballs in the pan and then add 12 cups of water.

Add 1 Tbsp + a couple of tsp (or just use one of the big spoons from your drawer & add that) of the Chicken Better Than Bullion, and add 1 & 1/2 tsp (or use one of the small spoons out of your drawer) of the Vegetable Better Than Bullion.

Bring temp up until a few bubbles rise to the surface and then add your drained pasta. Simmer* for 5 minutes, then TASTE your soup. This is where you adjust your seasonings by adding any salt & pepper, or if you need a touch more chicken flavor (if the soup tastes watery) add a little more of the Better than Bullion. If the soup is too salty, add a little more water. Enjoy!
*Simmer is a culinary term used frequently that I want to explain here. You will probably turn the heat back down to about medium or so on your stove, but you want to make sure that you still have some bubbles coming to the surface of your pan. Not boiling, but a light bubbling.
Here is what my finished soup looked like:

Sorry for the slightly blurred picture. Here is what my soup looked like when served:
Feel free to sprinkle on some extra Parmesan Cheese as a garnish!

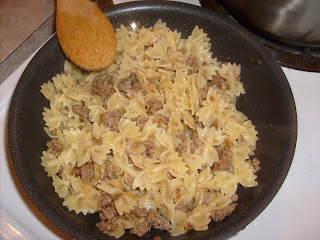
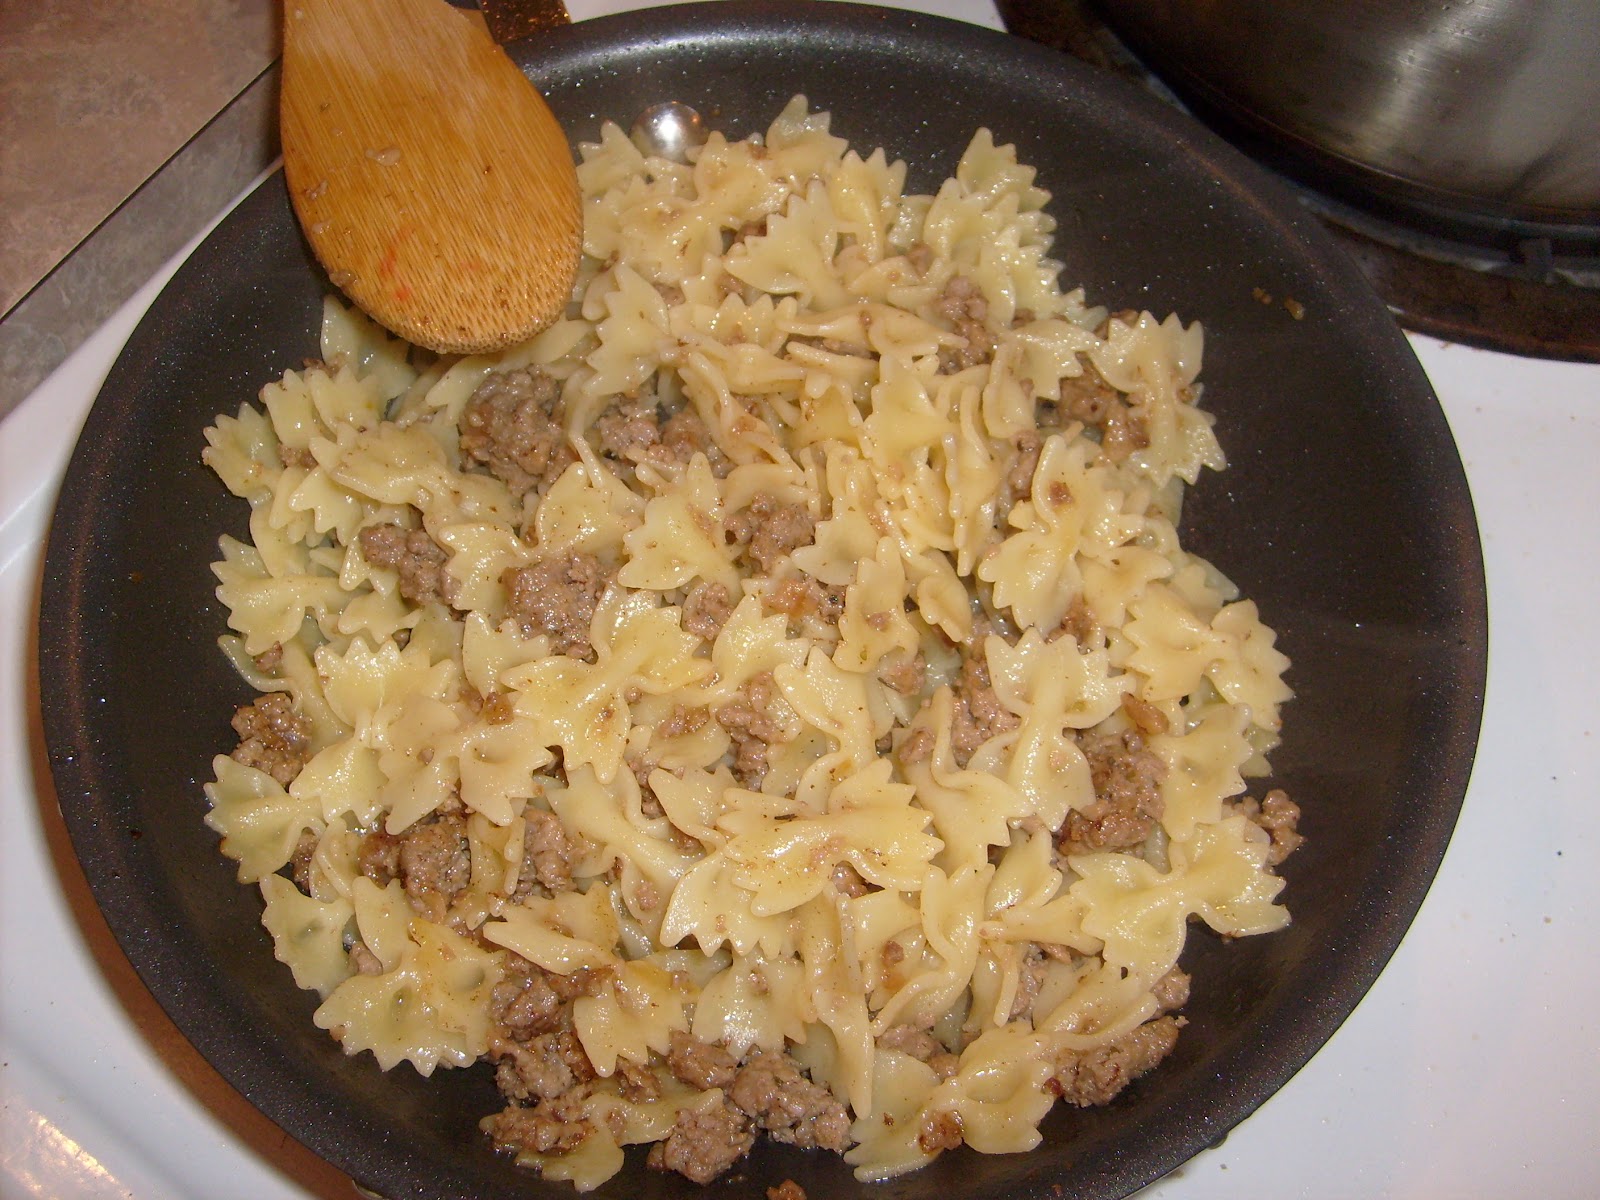
Here's a quick look at what my kids had for dinner. They usually have soup with us, but since I had the minor fiasco with the meatballs sticking I put those bits that stuck to the pan and tossed it back into my non stick pan after I wiped out the extra grease. I tossed in some pasta that I finished cooking and then topped with some extra Parmesan cheese. They were happy with their meal.
I served our soup with some strawberries I tossed with some homemade vanilla sugar. Let me know if anyone wants to know how to do this later & I'll make it a blog post.

We also had homemade baguette as well. This probably will be a future blog post. For some reason people think it's hard and time consuming to make homemade bread, stay tuned. Hopefully I'll be able to change some of your minds about this.

Thursday, December 29, 2011
A Reader's Question: What happens if I don't have a bunt pan?
So, I am excited to report that I've had a question about how to make the Monkey Bread if you don't have a bunt pan. Well, I'm thinking that the recipe would work fine using a loaf pan, just adjust your cooking temperature to 325 F for 35 minutes. I haven't had a chance to try this, so make sure to keep an eye on it. You don't want your bread to burn, but you want to make sure the middle is cooked.
Also, the second part of the question was where to find the Rhodes Roll 12 pack of Cinnamon Rolls. Well, those you find in a bag in the freezer section of your grocery store. If you want a recipe that works even faster, you can buy two packages of 6 rolls that comes in the foil pan, thaw them slightly, cut them, put on the cinnamon sugar, pour on the butter & throw them in a cold oven following their package directions.
Hope this helped to clear things up a bit! Glad to hear that several of you want to try my recipe. I want to hear how it turns out for you all.
I've been working on the blog a bit today; getting things linked on facebook and coming soon google plus. Look for another recipe coming soon.
Also, the second part of the question was where to find the Rhodes Roll 12 pack of Cinnamon Rolls. Well, those you find in a bag in the freezer section of your grocery store. If you want a recipe that works even faster, you can buy two packages of 6 rolls that comes in the foil pan, thaw them slightly, cut them, put on the cinnamon sugar, pour on the butter & throw them in a cold oven following their package directions.
Hope this helped to clear things up a bit! Glad to hear that several of you want to try my recipe. I want to hear how it turns out for you all.
I've been working on the blog a bit today; getting things linked on facebook and coming soon google plus. Look for another recipe coming soon.
A little about my Culinary Background
Starting out here & switching over my blog, several of my friends probably already know this. For those of you who are finding me for the first time, Welcome! I've always have had a love of cooking & would help out my mom in the kitchen a lot when I was growing up. By the time I got to College, I studied for a degree in Nutrition and Food Science with the Food Science emphasis. My first job out of college was in quality control at an industrial Bakery. From there, I went into flavor applications at a small flavor company that manufactured liquid smoke. I realized there that I really wanted to go back to school to get my Culinary Arts degree. So, while I was working I started my Culinary Studies and did my restaurant internship at the Wisconsin Room at the American Club in Kohler, WI. Now that was a learning experience! It was a good thing I did it while I was young, because I worked full time at the flavor company, spent Fridays at Culinary School, and then went and worked the dinner shift at the restaurant on the weekends Fri - Sun. From here, life happened a bit. I wound up changing positions to work in flavor applications for another flavor company and wasn't able to make it back to finish my culinary degree for a couple of years and several moves later. So, about 4 years after I started, I finally re-entered a Culinary Program in Cincinnati and later earned my Culinary Certificate by going to night classes. (The counselor at the school told me an Associates Degree would be repetitive since I already held a Bachelor's Degree). This also helped my career a bit and I was able to switch a bit from just doing flavor applications to expanding into Creative Development. I also was promoted to a Senior Food Scientist/Research Chef. I waited until others recognized me as a chef, before I called myself one. I felt like it was something I had worked hard for and was proud to be recognized as such. Then, after a few more years, life happened a bit again. My husband went active duty in the Army and our first duty station was overseas in Germany. It was time for me to walk away from the flavor industry for a bit and focus on being a mom & wife. I've enjoyed my time exploring new recipes and cooking for my family, and as I've shared on facebook I've started to have more friends ask me for recipes, and ask food questions in general. I also had some fun teaching a few cooking classes while we were overseas. Now that we're back in the States I decided to go ahead & start taking some pictures and share what I'm cooking.
Feel free to look around, ask some questions, post some comments. If you have a dish that you've been wanting to cook but feel like it's too intimidating, let me know. I may already have a recipe for it and would be happy to share.
Thanks for joining me in my cooking adventures! I may not post every day, or I may post every day. Life kind of has it's way of keeping things interesting, but I hope you all will enjoy this as much as I do.
Catherine
Feel free to look around, ask some questions, post some comments. If you have a dish that you've been wanting to cook but feel like it's too intimidating, let me know. I may already have a recipe for it and would be happy to share.
Thanks for joining me in my cooking adventures! I may not post every day, or I may post every day. Life kind of has it's way of keeping things interesting, but I hope you all will enjoy this as much as I do.
Catherine
Monday, December 26, 2011
Monkey Bread
The first recipe I want to share with you all is for a quick and easy Monkey Bread. For this recipe you will need:
Rhodes Rolls - Traditional Cinnamon Rolls (12 pack)
1/3 Cup Sugar
1 tsp. Ground Cinnamon
4 Tbsp. Butter, Melted
Cooking Spray Oil (like Pam, Crisco, etc.)
Bunt Pan
Take the rolls out of the freezer & allow to thaw slightly, around 15 minutes. Then, place on a cutting board and cut into fourths.

In a separate bowl, blend sugar and cinnamon.

Place pieces of dough in the bowl with the sugar & toss to coat. Transfer into a greased bunt pan.

This is what my pieces looked like while tossing in the sugar:

When finished tossing all the pieces, sprinkle any extra cinnamon sugar over the dough in the bunt pan. Cover with plastic wrap & refrigerate overnight.
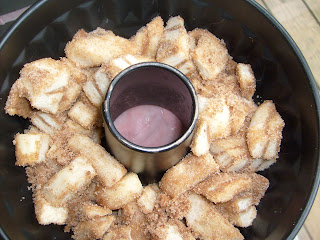
You can see that mine really doesn't look like it's risen a whole lot overnight. It's ok though. Preheat your oven to 350 F. Melt butter in the microwave & pour over the dough after you remove the plastic wrap and then bake for 20 minutes.

This is what it looks like when it comes out of the oven (almost to the top of the pan). Allow to cool for about 5 minutes & then turn out on to a plate. You need to flip it while it's still warm or you will probably have trouble getting it to come out of the pan:

The next 2 pictures show what it looks like if you forget to grease your pan or spray it with non-stick spray:


And this is how it turns out when you remember to spray your pan:

Enjoy this recipe with the cream cheese icing that comes in the package. I'd love to hear your thoughts if you try this out.
Rhodes Rolls - Traditional Cinnamon Rolls (12 pack)
1/3 Cup Sugar
1 tsp. Ground Cinnamon
4 Tbsp. Butter, Melted
Cooking Spray Oil (like Pam, Crisco, etc.)
Bunt Pan
Take the rolls out of the freezer & allow to thaw slightly, around 15 minutes. Then, place on a cutting board and cut into fourths.

In a separate bowl, blend sugar and cinnamon.

Place pieces of dough in the bowl with the sugar & toss to coat. Transfer into a greased bunt pan.

This is what my pieces looked like while tossing in the sugar:

When finished tossing all the pieces, sprinkle any extra cinnamon sugar over the dough in the bunt pan. Cover with plastic wrap & refrigerate overnight.

You can see that mine really doesn't look like it's risen a whole lot overnight. It's ok though. Preheat your oven to 350 F. Melt butter in the microwave & pour over the dough after you remove the plastic wrap and then bake for 20 minutes.

This is what it looks like when it comes out of the oven (almost to the top of the pan). Allow to cool for about 5 minutes & then turn out on to a plate. You need to flip it while it's still warm or you will probably have trouble getting it to come out of the pan:

The next 2 pictures show what it looks like if you forget to grease your pan or spray it with non-stick spray:


And this is how it turns out when you remember to spray your pan:

Enjoy this recipe with the cream cheese icing that comes in the package. I'd love to hear your thoughts if you try this out.
Subscribe to:
Posts (Atom)


